Inserting an Image into a Frame
Created by ChatyC126 aka Cathy
To view with images click HERE to download as a word document.
I thought I’d write this tutorial because I see a lot of squished images in frames.
For example. Take this image
Notice how the kids look tall and skinny
In the frame layer use your magic wand, click inside the frame, modify expand by one or two.
Now make a new raster layer
Drag it under the frame layer by pulling it down.
Now go to your image, copy and paste as new layer, resize as needed.
You see that part of my image is hanging out of the frame. Simply go to selection, invert, and then delete.
You’re image fits so much nicer inside your frame now. I do this all the time, I rarely do paste into image anymore.
Add drop shadow to your frame layer, merge visible, add accents and you’re done.
Saturday, June 27, 2009
Saturday, May 30, 2009
Creating a White Edge around a Name
CREATING A WHITE EDGE AROUND A NAME
To create a white effect around a name I create the name.
Next: selections, select all, float, so that you have the ants around the name.


To create a white effect around a name I create the name.
Next: selections, select all, float, so that you have the ants around the name.

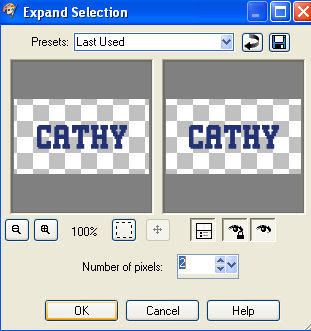
Then : Selections, modify, expand by one or two.


Make a new layer under the name layer. 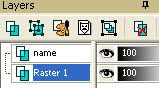

Floodfill this layer with white or any other color.
Now you can do a drop shadow to really make it stand out. I use this setting a lot.
2,2,50,5


If I am going to move it to animation shop I go back to the top layer and merge down and copy into AS.
Saturday, January 10, 2009
Cropping Your Scrap Pieces
Cropping your scrap pieces <--click to download word format By ChatyC126 aka Cathy
(I wrote this small tutorial mainly for people creating scraps or people that download scraps and the creators didn't do it.
For example you have downloaded a scrap from the web and the person did not crop the scrap pieces all nice and neat, if you copy and paste as a new image to make it smaller, than you loose their image name and information.)
Some tips
There is no need to leave all that extra transparent area around your scrap pieces. There are two ways that I know of to crop it to fit.
Another way
(I wrote this small tutorial mainly for people creating scraps or people that download scraps and the creators didn't do it.
For example you have downloaded a scrap from the web and the person did not crop the scrap pieces all nice and neat, if you copy and paste as a new image to make it smaller, than you loose their image name and information.)
Some tips
There is no need to leave all that extra transparent area around your scrap pieces. There are two ways that I know of to crop it to fit.
One way is to use the selection tool. 

Click on the selection tool to make it active , now look on your tool bar and click layer opaque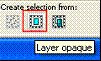 , this will now put the marching ants around your scrap piece.
next go to image, crop to selection.
And your scrap is now cropped closely.
 , this will now put the marching ants around your scrap piece.
next go to image, crop to selection.
And your scrap is now cropped closely.
Another way
This is how I do it. Click on the crop tool, then on the tool bar find
snap crop rectangle to:
snap crop rectangle to:

and click layer opaque. It brings the crop exactly to the edges of your scrap.
Go to your image and double click to crop.
Go to your image and double click to crop.
Subscribe to:
Posts (Atom)


